Cloud Sync
Supports dual-mode cloud sync over Git or WebDAV with encrypted synchronization of uniTerm settings: the Git mode uses your own private repository (GitHub / GitLab / Gitee), while the WebDAV mode works with any standard WebDAV service. Your data security stays fully under your control.
Quick Setup
1. Create a Private Repository + Access Token
GitHub
Create a private repository: Log in to GitHub → Click + in the top right → New repository → Enter a repository name → Choose Private → Create repository.
Generate an access token: Settings → Developer settings → Personal access tokens → Fine-grained tokens → Generate new token:
- Repository access: Choose Only select repositories and select the private repository you just created
- Permissions → Contents: Set to Read and write
- Copy the token after generation (it is shown only once)
GitLab
Create a private repository: Log in to GitLab → New project → Create blank project → Enter a project name → Set Visibility Level to Private → Create project.
Generate an access token: Settings → Access Tokens → Add new token:
- Token name: Enter a name
- Select scopes: Check api, or at least check read_repository + write_repository
- Copy the token after generation (it is shown only once)
Gitee
Create a private repository: Log in to Gitee → Click + in the top right → New Repository → Enter a repository name → Choose Private → Create.
Generate an access token: Click your avatar in the top right → Settings → Private Tokens → Generate New Token:
- Check user_info and projects permissions
- Copy the token after generation (it is shown only once)
WebDAV
The WebDAV mode needs no repository — just prepare a WebDAV service:
- Server URL: works with WebDAV-capable clouds (Nextcloud, Jianguoyun, InfiniCloud, ...) or a self-hosted service; the URL must include protocol and port
- Account: the username and password (app password) of that service
2. Configure uniTerm
- Open Settings → Cloud Sync and click "Add Repository", choosing Git or WebDAV as the sync source
- Git: enter the repository URL, username (optional), and access token; WebDAV: enter the server URL (with protocol and port), username, and password
- Set a master password (used to encrypt data; it is not uploaded to the repository or cloud drive)
- Click OK, and uniTerm will automatically complete the initial synchronization
- Tick the data to sync under "Sync Scope" as needed
Note
- Keep your token and master password safe. The token is shown only once
- The repository must be set to private, otherwise synchronized data will be publicly visible
- When syncing across multiple devices, enter the same repository URL, token, and master password on each device
Sync Operations
Manual Sync
Click the "Sync Now" button, and uniTerm will automatically compare local and remote differences:
- Local is newer → Push to remote (upload)
- Remote is newer → Pull to local (download)
- No differences → Already up to date
Auto Sync
When auto-sync is enabled:
- Sync automatically once at startup
- Upload automatically after each modification to connections, favorites, quick commands, tunnels, identities, or proxies
Sync Contents
The following data is synchronized (stored encrypted):
- Connection list and groups
- Connection favorites
- AI configuration (model catalog and autonomous turn limit)
- Quick commands
- SSH tunnels
- Keystore identities
- Proxies
Data that is NOT synchronized:
- Application personalization settings (theme, paths, shell, shortcuts, interface layout, etc. — effective only on the local machine)
- AI sessions and skills (local only)
- Cloud sync configuration itself (configured independently per device)
- Terminal history
Conflict Handling
Synchronization pulls from the remote before pushing, so conflicts generally do not occur when two machines are used alternately. When multiple devices modify the same data at the same time without pulling the latest version before pushing, uniTerm shows a conflict resolution dialog with two options:
- Use Local Data — Use the current device's data as authoritative, overwriting the remote repository
- Use Remote Data — Use the remote repository's data as authoritative, overwriting the current device
Encryption & Security
- Encryption Algorithm: AES-256-GCM, using a random nonce for each encryption
- Key Derivation: The encryption key is derived from the master password using the PBKDF2-SHA256 algorithm
- Key Storage: The derived key is stored in the operating system keychain (Windows Credential Manager / macOS Keychain / Linux keyring)
- Zero Trust: All data is encrypted on the client side before uploading. The Git server only sees ciphertext
Managing Repositories
Modify Credentials
Click "Edit Repository" to modify the username and access token. The repository URL cannot be modified (you must unbind first and then reconfigure).
When modifying credentials, uniTerm automatically verifies that the new token can access the repository and that the master password can decrypt the remote data.
Change Master Password
Click "Change Master Password" to change the encryption password. The key is re-derived using the same salt, and all data is re-encrypted and pushed.
Unbind
Click "Unbind" to:
- Delete the local sync repository
- Clear the encryption key and token saved in the keychain
- Reset the sync configuration
The remote repository will not be deleted. To delete it, go to the Git service platform and do so manually.
Sync Status
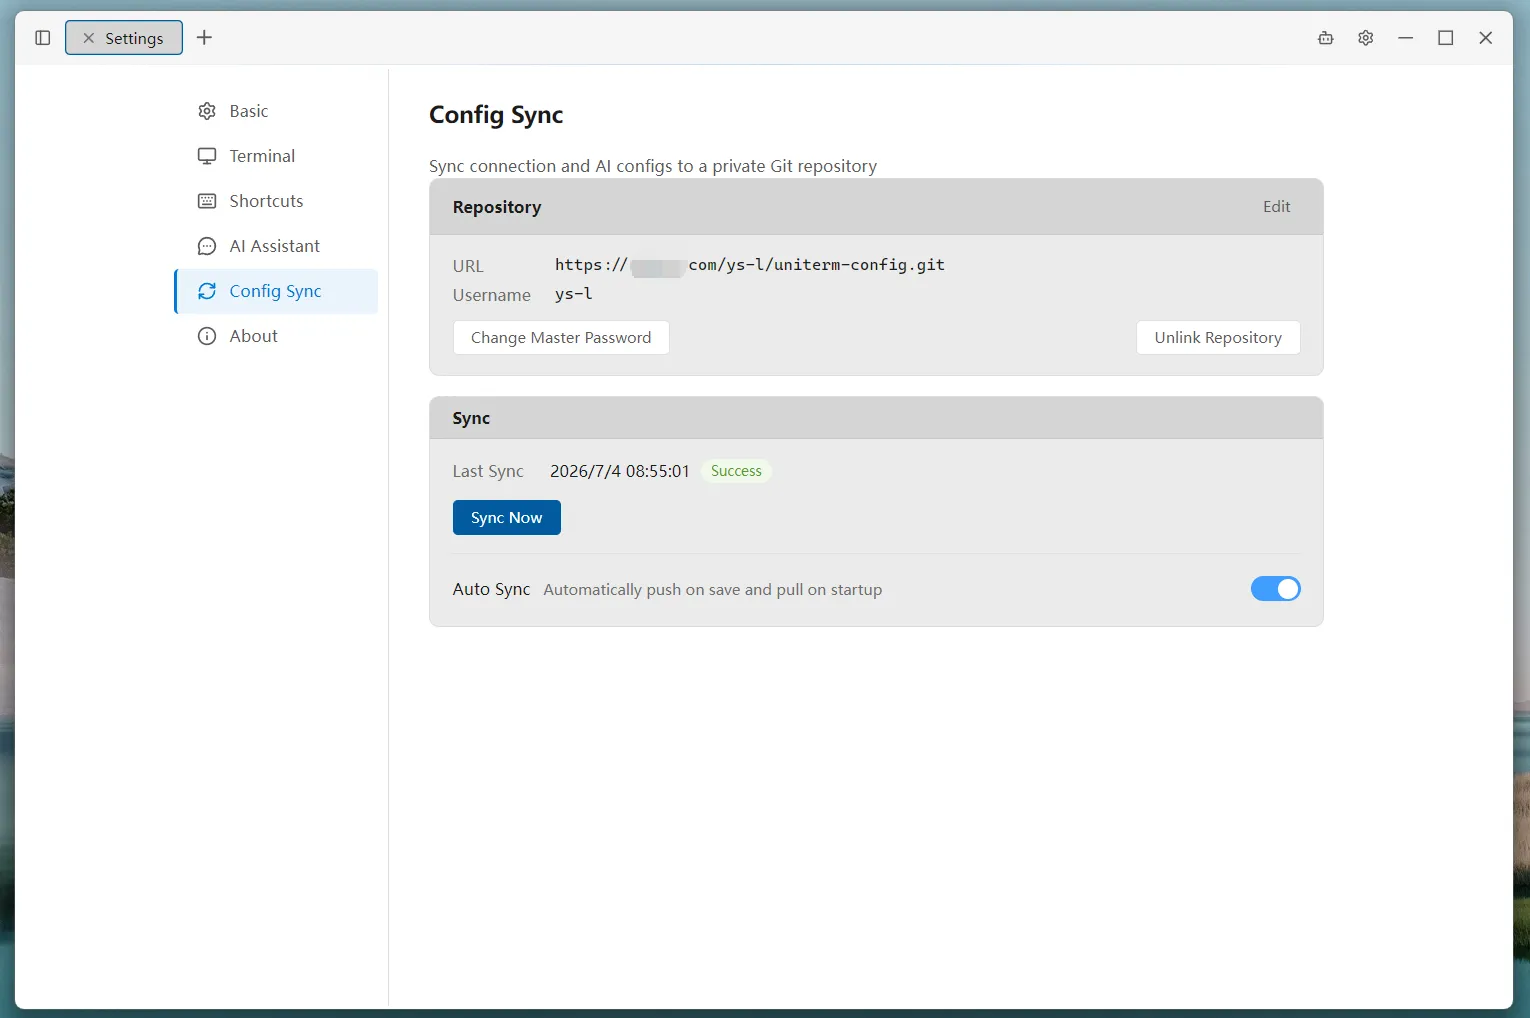
The Settings page displays the time and status of the last synchronization:
- Success (green) — The most recent sync completed normally
- Failed (red) — Displays the specific error message (e.g. network timeout, invalid token, etc.)